
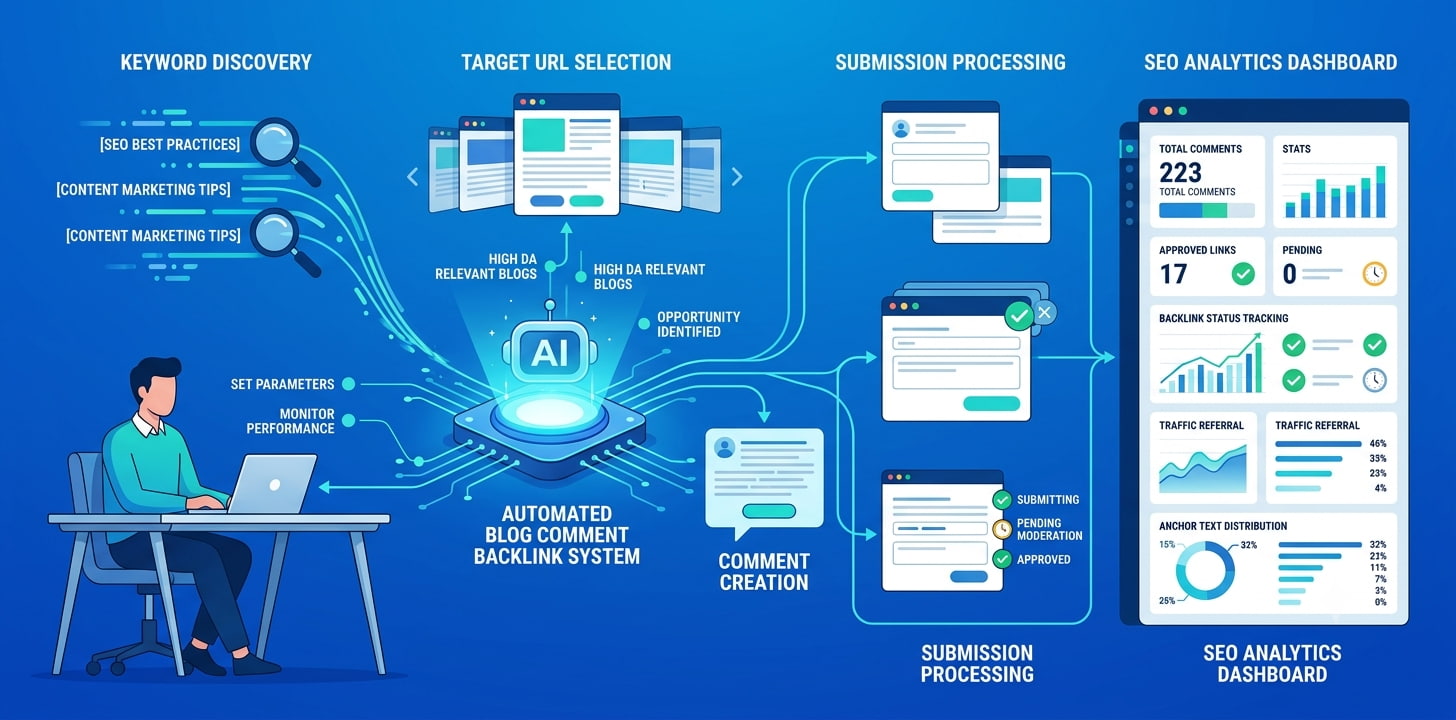
Backlinks from blog comments still carry real SEO value, but doing it by hand doesn't scale: finding relevant blogs, checking whether each one even has a working comment form, writing something that isn't obvious spam, and logging in a dozen different ways depending on how each blog is set up. Here's exactly how Blog Commentor automates that whole process, from finding blogs to tracking every submission.
What Is Blog Commentor?
Blog Commentor finds blog posts related to your target keyword, submits a comment (with your link) to each one, and reports back on exactly what happened — submitted, pending, or failed, with a reason for every failure instead of a silent dead end.
Everything is organized around Projects: one project per keyword or client, with its own target link, comment library, and submission method.
Step 1: Create a Project
A project defines what you're promoting and how comments should read. You'll set:
.png)
- Keyword — what the project searches for when finding blogs to comment on.
- Link Title(s) — the anchor text/display name used when your link is included in a comment.
- Comment Templates — write your own, or use the built-in AI Comment Generator to draft several variations from your keyword and link, so you're not posting the exact same comment everywhere.
- Commenter Name and whether to include your URL in the comment at all.
Step 2: Choose How Comments Get Submitted
Not every blog accepts comments the same way, so each project picks one submission method up front:
- WordPress.com — connects your WordPress.com account so comments post as you, the way Jetpack-powered comment forms expect. Best fit when most of your target blogs are WordPress.com-hosted or use Jetpack Comments.
- Hosted WordPress — log in with a username and Application Password for a self-hosted WordPress site you control, letting the project post through that account.
- Without Login — posts as an anonymous visitor, exactly like someone filling out a blog's public comment form. Works on the many ordinary WordPress blogs that don't require an account to comment.
Picking the right method matters: a Jetpack-powered comment form will always redirect an anonymous submission to a login page, so those targets need the WordPress.com method specifically — Blog Commentor detects this automatically and tells you in the report rather than quietly failing.
Step 3: Find Blogs to Comment On
From Import Links, there are three ways to build a project's list of target blog posts:
- Search WordPress.com — searches WordPress.com's own index for posts matching your keyword, with pagination to go deeper into the results.
- Search Google — pulls from Google News for your keyword and flags which results are detectably WordPress sites, so you can prioritize the ones most likely to accept a comment.
- Manual Paste — already have a list of URLs? Paste them in directly, comma-separated.
Every project has a maximum link limit, shown right on the form, so you always know how much room you have before you start importing.
Step 4: Submit Comments
Once a project has links, submit comments two ways:
- Submit one at a time from the Reports table — useful for reviewing exactly what's about to be posted before it goes out.
- Submit All — processes a batch of pending links in one click, spaced out automatically so you're not hammering multiple sites' comment forms in a burst (which is exactly the pattern anti-spam systems are built to catch).
Behind the scenes, each submission tries to resolve the target's real WordPress comment form, fills in your comment text and link, and posts it using whichever method the project is set to.
Track Every Submission
The Reports table shows every link in a project with its status — submitted, pending, or not yet commentable — and a "Why?" detail on anything that failed, instead of a generic error. Common, honest reasons include the target requiring a login you haven't connected, or the site temporarily rate-limiting submissions (which simply succeeds on a later retry).
Why Use This
- Find relevant blogs automatically — no manually searching and copy-pasting URLs one at a time.
- Match the right method to each site — instead of anonymous submissions silently failing on sites that actually require login.
- Avoid duplicate, obviously-spammy comments — AI-generated variations mean you're not posting identical text everywhere.
- See exactly what happened — every submission's real outcome, not just a vague success/fail count.
Frequently Asked Questions
Will this post the same comment everywhere?
Not if you use the AI Comment Generator or write a few of your own variations — the project picks from your available comment text rather than repeating one line on every blog.
What happens if a blog requires me to be logged in to comment?
Blog Commentor detects this and reports it clearly instead of silently failing — switch that project's submission method to WordPress.com if most of your targets need it, or Hosted WordPress if you have your own account on the target site.
Can I review comments before they're posted?
Yes — submit links one at a time from the Reports table if you want to control exactly what goes out and when, instead of using Submit All.
What if a submission fails?
Check the "Why?" detail in Reports for the real reason. Many failures (like temporary rate limiting) resolve themselves on the next submission attempt.
Ready to try it? Create a project, add your keyword and link, and import your first batch of blogs to comment on.